|
|
For production and research - inspection of can profiles
|
|||||||||||||||||||||
| State-of-the-art
technology
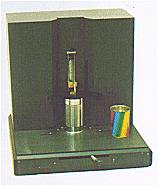
The Can Profile Analyzer is a computerized, fully-automatic, instrument for measuring an entire can profile, including: beads, flanges, can-height and neck information. The system is designed for can manufacturers, using beads to improve the structural strength of their cans. The system quickly analyzes the can information, providing a clear and accurate view of how well the beading process matches the design specifications. The user-friendly Can Profile Analyzer is very simple to use. Its' simple operating procedures allow anyone to perform can profile analysis with minimal training. The small maintenance requirements allows the Can Profile Analyzer to be used in practically any environment. |
|||||||||||||||||||||
Features
|
|||||||||||||||||||||
| How
does the Can Profile Analyzer Work?
The Can Profile Analyzer utilizes state-of-the-art laser technology to quickly scan the profile of the can, without any contact devices. The system retrieves the laser reflection using a sensor. Once the entire can
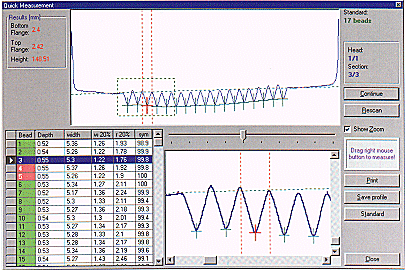
profile has been scanned, the image of the profile will be displayed on-screen
and the profile is analyzed. The analysis determines detailed information
about each bead, including: bead depth, bead width, width at 20% height,
radius of the bottom of the bead (at 20%) and symmetry (in percent). In addition, the system also analyzes the can height and flange widths, as well as the neck parameters: the three neck radiuses and the neck angle. The competing contour-meter technology is impractical for production requirements. In most instances, the speed and resolution requirements prevent this type of measurement device from effectively determining the quality of the beading process in production settings. Other devices may provide bead height without much information as to how the measurement was taken. In some instances, bead height can be perfect, whereas an entire group of beads is set abovc or below the reference line. Since standard bead measurement systems do not provide the user with a full profile of the can - this issue cannot be detected by these systems. The Can Profile Analyzer can also integrate measurement information from external gauges such as height and diameter gauges -allowing the information to be printed in the standard profile reports. For a higher accuracy level, the Can Profile Analyzer also provides gauge support for flanges and can height. |
|||||||||||||||||||||
Specifications
| Can diameter | 50 to 250mm |
| Can height | 50 to 250mm |
| Number of beads | unlimited |
| Bead group configuration | unlimited |
| Number of scans per head | 6 |
| Bead depth | 0 to 3.5mm |
| Flange width | 0 to 3.5mm |
| Measurement resolution | 0.015µ (15 microns) |
| Measurement unit | mm, Microns, Inch, MIL |
| Type of cans | Flanged body
Bottom seamed Finished can |
Configuration
| PC | Pentium 2OOMhz(or higher), 24M RAM (or more), 2.1G HDD, 3.5" floppy |
| Operating System: | Windows 95/98 |
| Output: | Laser/Ink-jetprinter |
| Peripherals: | Mouse, Keyboard 14" SVGA monitor |
| Optical unit: | 0.015mm resolution, pre-focused and pre-calibrated |
| Calibration gauge: | Please contact us for information regarding an optional certified gauge |
| Dimensions and weights: | |
| Optical Unit: | (24Kg) 430mm(W), 380mm(D), 520mm( H) |
| Computer: | (15Kg) 480mm(W), 620mrn(D), 157mm( H) |
| Monitor: | (11 Kg) 410mm(W), 386mm(D), 440mm(H) |

